RomanDA's DesktopX Tutorials:
My goal is to make a set
of tutorials for DesktopX. If you have ideas on what you would like to
see, please email me at
DXTutorials@RomanDA.org
 |
 |
 |
|
Master
Background |
Transparent
Background |
Item Frame |
|
MasterBack |
transparentback |
Area1,2,3,4 |
The trick to using these is in
the ADVANCED properties in DX!
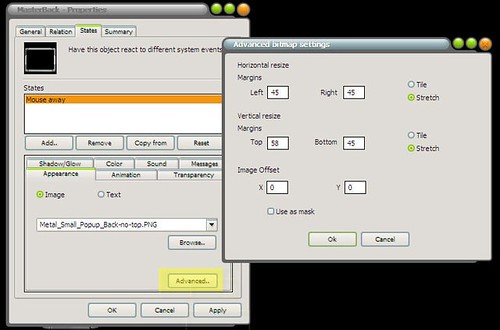
By using these setting you are
able to "stretch out" the Background and still keep its shape and look.
The Left/Right/Top/Bottom are in PIXELS. You have to know the position of
things in your images to be able to use the correctly.
I used the same ADVANCED
settings to take the very small Item Frame and make it into the bars you
see in the working widget.
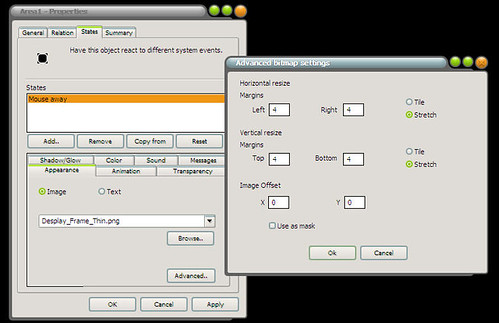
This is a great part of DX, it
allows you to have a REALLY small png file and use it to make just about any
sized bar.
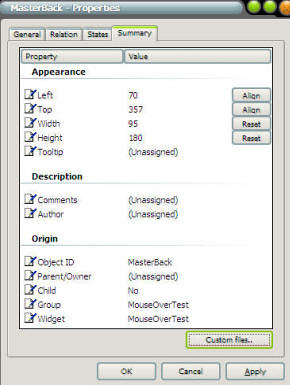
Use these setting below to work
out the height/width/top/left/and parent/child relationships:
 |
 |
 |
| MasterBack |
transparentback |
area1 |
 |
 |
 |
| area2 |
area3 |
area4 |
 |
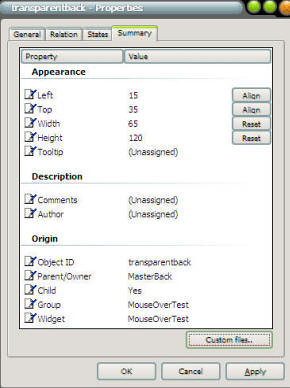
You need to
change the Transparency on
transparentback item.
This makes this item nearly
invisible.
DO NOT EVER
SET IT TO 0 for the opacity!!
I have had DX BLOW UP on me
simply by setting this to 0.
This will be the "container" for the AREA(1,2,3,4) items.
<----------
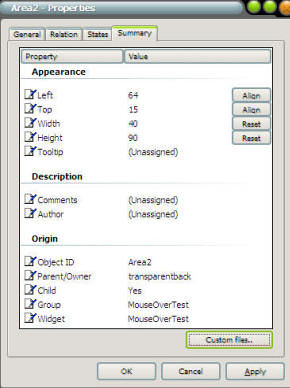
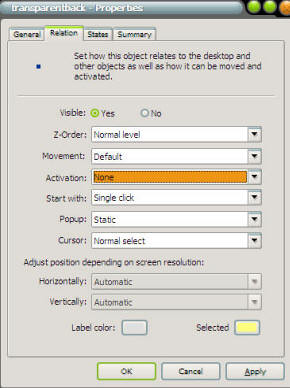
In the properties of the
transparentback as well as
all of the areas you need to change the "activation"
to "NONE" this makes the mouse ignore these areas.
This would need to be a
little different if you are wanting
the areas to be "buttons" in a menu system.
BUTT, if your doing that setup, you should use a
mouse over, i would make a btn you CLICK to show
the menu then click to Hide it! -----------------------> |
 |
So now you have all the parts.
and hopefully you have them all put together right.
The way this works is as follows:
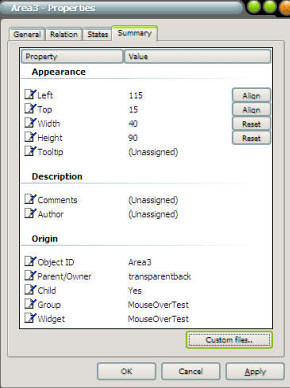
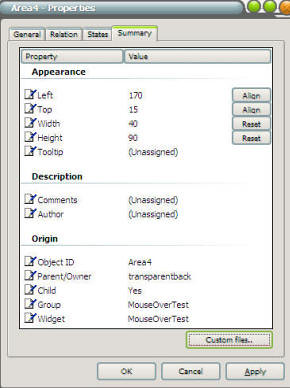
- The AREAS(1/2/3/4) reside on
top of the transparentback object.
- transparentback object
resides on top of the MasterBack object.
- The Script we will create will
make the transparentback's width/height match the MasterBack (-
a little to make it reside INSIDE)
|
STEP 2: Let's look at the scripts: |
| |
Ok, now that we have the objects
made, lets play with some scripts.
The only object that has a script is MasterBack.Click the PROPERTIES of
MasterBack then click on ""NEW" for the script.
|
Dim MinW,MaxW
MinW = 100
MaxW = 250
Sub
Object_OnScriptEnter
object.width = MinW
desktopx.Object("transparentback").top = 35
desktopx.Object("transparentback").left = 15
desktopx.Object("transparentback").width =
object.width-30
desktopx.Object("transparentback").height =
object.height-60
End Sub |
The above script is designed to
set the default size of the MasterBack to its Min Size.
You could easily change the MinW (minimum width) and MaxW (maximum width) to be
whatever settings you want.
It also sets the top/left/height/width of the transparentback object to
match the size of the MasterBack object.
Sub Object_OnMouseEnter
Call Grow
End Sub
Sub
Object_OnMouseLeave
Call Shrink
End Sub |
The above scripts are to handle
the mouse over/leave states.
I have them call sub functions so i could keep track of what it was doing.
It could easily be changed to work without these sub functions.
Function Shrink
object.KillTimer 200
object.SetTimer 100,10
End Function
Function
Grow
object.KillTimer 100
object.SetTimer 200,10
End Function |
These functions start and stop
the "grow" and "shrink" function of the widget.
You can make it grow/shrink faster or slower by changing the ,10 in the SETTIMER
function.
The 10 is 10 ms. If you want it to be slower make it 20 or 30, faster
would be 5, 2.
Sub object_ontimer100
If object.width => MinW Then
object.width =
object.width - 5
desktopx.Object("transparentback").width = object.width-30
Else
object.KillTimer 100
End If
End Sub
Sub
object_ontimer200
If object.width <= MaxW Then
object.width =
object.width + 5
desktopx.Object("transparentback").width = object.width-30
Else
object.KillTimer 200
End If
End Sub |
These are really pretty simple
"grow" and "shrink" functions.
object_ontimer100 Shrinks the MasterBack width down by 5 pixels at
a time until it reaches the MinW value.
It also changes the transparentback object's width as well.
By making the transparentback shrink at a smaller size than the
MasterBack it looks like the AREA(1/2/3/4) objects are being hidden.
object_ontimer200 does the
same thing only in reverse. It makes the object GROW at 5 pixels at a time
until it hits the MaxW value.
Once they reach their set values,
they KILL the timer so it stops trying to shrink or grow.
I also added this code in the shrink/grow functions to be sure it doesn't get
stuck in a loop.
|
In Conclusion |
| |
This is a really simple way to
have a container that shows and hides objects placed inside it. I have
used this for my
GalCiv II Drive Meter widget. I know this seems simple, but it
took me a while to figure this out. I hope by posting this article and the
widget that I can help other people who are attempting to learn DX. The
potential for DX is amazing.
Please let me know if you have
problems, comments, or questions with this.
|