
 |
| Step-by-Step Tutorials |
#3 -
Attack of the Clones |
|
A series
by RomanDA |
|
Listing of other DX Tutorials:
Click
here Today's Lesson:
"Attack of the Clones"
In this lesson we will
cover how to create a clone from an object, so we can have multiple
items on the screen linked to a Folder, a Program and a web URL.
In order to use this tutorial,
you will need to first go thru
Tutorial #2
(and download the zip file from there as well).
I will assume you downloaded the
zip of the png files, followed the Tutorial #2, and are ready to take your
Lightbulb and make a new one that will point to a Program and another to a URL.
For this and all the
Step-By-Step DX Tutorials you will need to purchase
DesktopX for $14.95 from Stardock.
Lets get started. |
|
|
|
STEP 1 - Cloning the Lightbulb |
Again, I know this is
redundant but you need to have completed Tutorial #2 before you attempt
this one. That said, we will take our lightbulb and make a clone:
- RIGHT CLICK
on the light bulb, and you will be presented with a menu of options.
- Select CLONE
OBJECT(S)
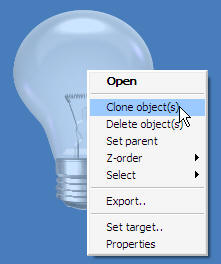
- You should see the following now:
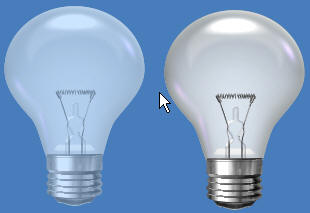
You have just created a CLONE!!
*** Repeat this step one more time so that you end up with 3
lightbulbs *** |
|
|
|
STEP 2 - Point your Clone to a Program |
- Pick one of the
clones and RIGHT-CLICK on it
- Select PROPERTIES
- Follow the steps
below to select a program to run:
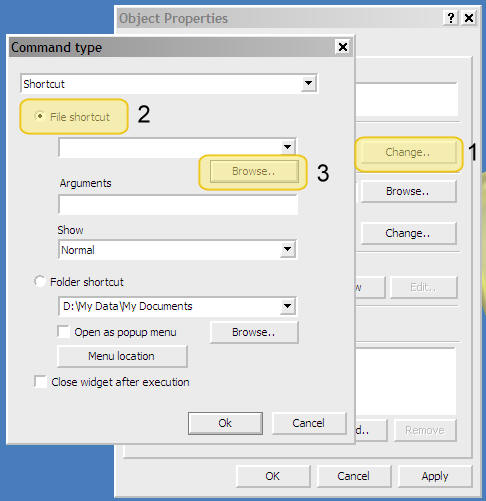
- Click CHANGE
next to the OBJECT TYPE (Shortcut)
- Select the
FILE SHORTCUT
- BROWSE
for a file to use
- use the
dialog box to select whatever file you want to run
- I will let
you select the file, its your call.
- Select OK
on the Browse Dialog Box
- Select OK
on the PROPERTIES Dialog Box
- To test this out,
simply click on the Lightbulb and see if it loads your program.
|
|
|
|
STEP 3 - Adding a TOOL-TIP to these so you know which one is which |
Ok, you have 2 identical
(well 3 really) clones on your desktop. So that you can know which
one does what, we are going to add a TOOL-TIP (the text that shows up
when you mouse over something) to each.
- RIGHT-CLICK
on the the FIRST OBJECT (the one that points to the FOLDER) select PROPERTIES
- Click on the
SUMMARY Tab
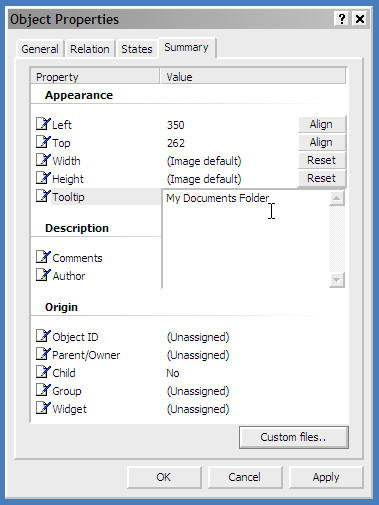
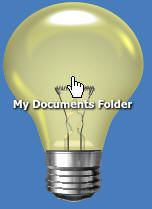
- Click in the area
next to TOOLTIP and type in MY DOCUMENTS FOLDER (or whatever
folder name you chose to use)
- Click OK
- To test this move
your mouse OVER the lightbulb and you should see:
- REPEAT THIS ON THE
OTHER 2
- Make one's tooltip -
MY PROGRAM NAME (using the name of the program you picked)
- Make the other one's
tooltip - WINCUSTOMIZE.com (thats where we are going to point that
one)
- This will give you
different tooltips on each one now (i hope)
|
|
|
|
STEP 4 - Making a URL Linked Object |
- RIGHT-CLICK
on the 3rd Clone and select PROPERTIES
- Follow the steps
below
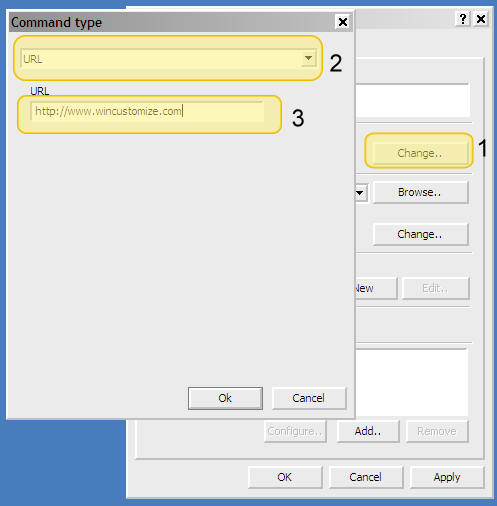
- CHANGE
next to the OBJECT TYPE (Shortcut)
- Pick URL
from the dropdown
- Enter
https://www.wincustomize.com
into the url area
- Select OK
- Select OK
|
|
|
|
CONCLUSION |
|
Ok, That wasn't hard was it?
Ok, yeah so now you have these 3 HUGE lightbulbs on your desktop, and
they suck, well make your own images, and change them! Changing
them is simple, go back to Tutorial #2, look at step #3 and just pick
your own images for "mouse over" and "mouse away" states.
You can even download from
the MISC Icons
library and use them for these states.
Check back as I add new
Step-By-Step Tutorials on how to make this a link to a folder, web-site,
or just about anything you want!
I hope you have enjoyed
this step into DX, and look forward to the next installment..
|